Mad Craft #4: Do It Yourself My Little Pony Pinata (Part 2 – A Papier Mache’ Cast)
When we last left the story, I had begun to suspect that I’d made a Pinata bigger than I intended. Catch up with Part 1 if you missed it! It was still the end of summer and nice outside, so the project had to move outdoors for the next phase. My daughter and son wanted to help, but I was reluctant to let them help me with the big project because I’d invested so much time and I had absolutely no idea what I was doing! I gave them their own bowls of Papier Mache’ and a balloon to work on. At first I had the thought that my five year old was going to be way better at this wet paper thing than I was, thankfully, my self-esteem remained intact as I watched her make a respectable mess. The two year old lost interest in about five seconds and went off to kick balls and find sticks for poking.
A Papier Mache’ Cast

Free newspaper and flour based papier mache
I usually keep the newspaper advertisements you get in the mail on weekends for just such a project I always intend to do, but never actually get to do or for starting fire in the fire pit. I had a lot of paper laying around. So far I haven’t spent any money on the project because I had cardboard and tape already. At this point, the cost was some flour. I am not sure if I used a whole bag, but one bag of cheap 5lb bag of really low-grade flour on sale cost me about $1.79. I did start with a simple no-cook recipe gleaned from Happy Hooligans, but after the first refill I just eyeballed the ratio of flour to water to get it to the consistency I wanted and added some salt. Measuring? We don’t need no stinking measuring!

Not very stable!
My husband has dubbed my pony “Little Foot” (the main character from The Land Before Time). Okay, it’s big but it’s not the biggest pinata ever and it’s NOT a dinosaur. It’s Twilight Sparkle! Stop laughing and go away, I’ve got some stability issues to deal with.
I tighten up the paper with more tape, make adjustments and tucks, and stuff with more paper those places that are sagging. It’s better but the saucy leg is causing some balance issues.

Propped and ready for casting!
I rummage through our recycling again and find an empty Ecover bottle to prop up the foot, then I find an old folding table to hold up the head. Perfect! My daughter is occupied, my son is — somewhere. I pause to find him and see that he’s trying to crawl up his dad’s behind. Yeah, that’s what you get for calling my awesome pony Little Foot.

Looking good!
I apply the first layer and let it dry and then apply the second layer a few hours later. There are some areas that are tough to get to, but I plan on finishing that indoors since the forecast doesn’t look promising for the next couple of days. Oh my, pony got back! I may have made the hindquarters a little ample. My husband thoroughly enjoys making jokes about the pony posterior; I make a few witty remarks of my own.
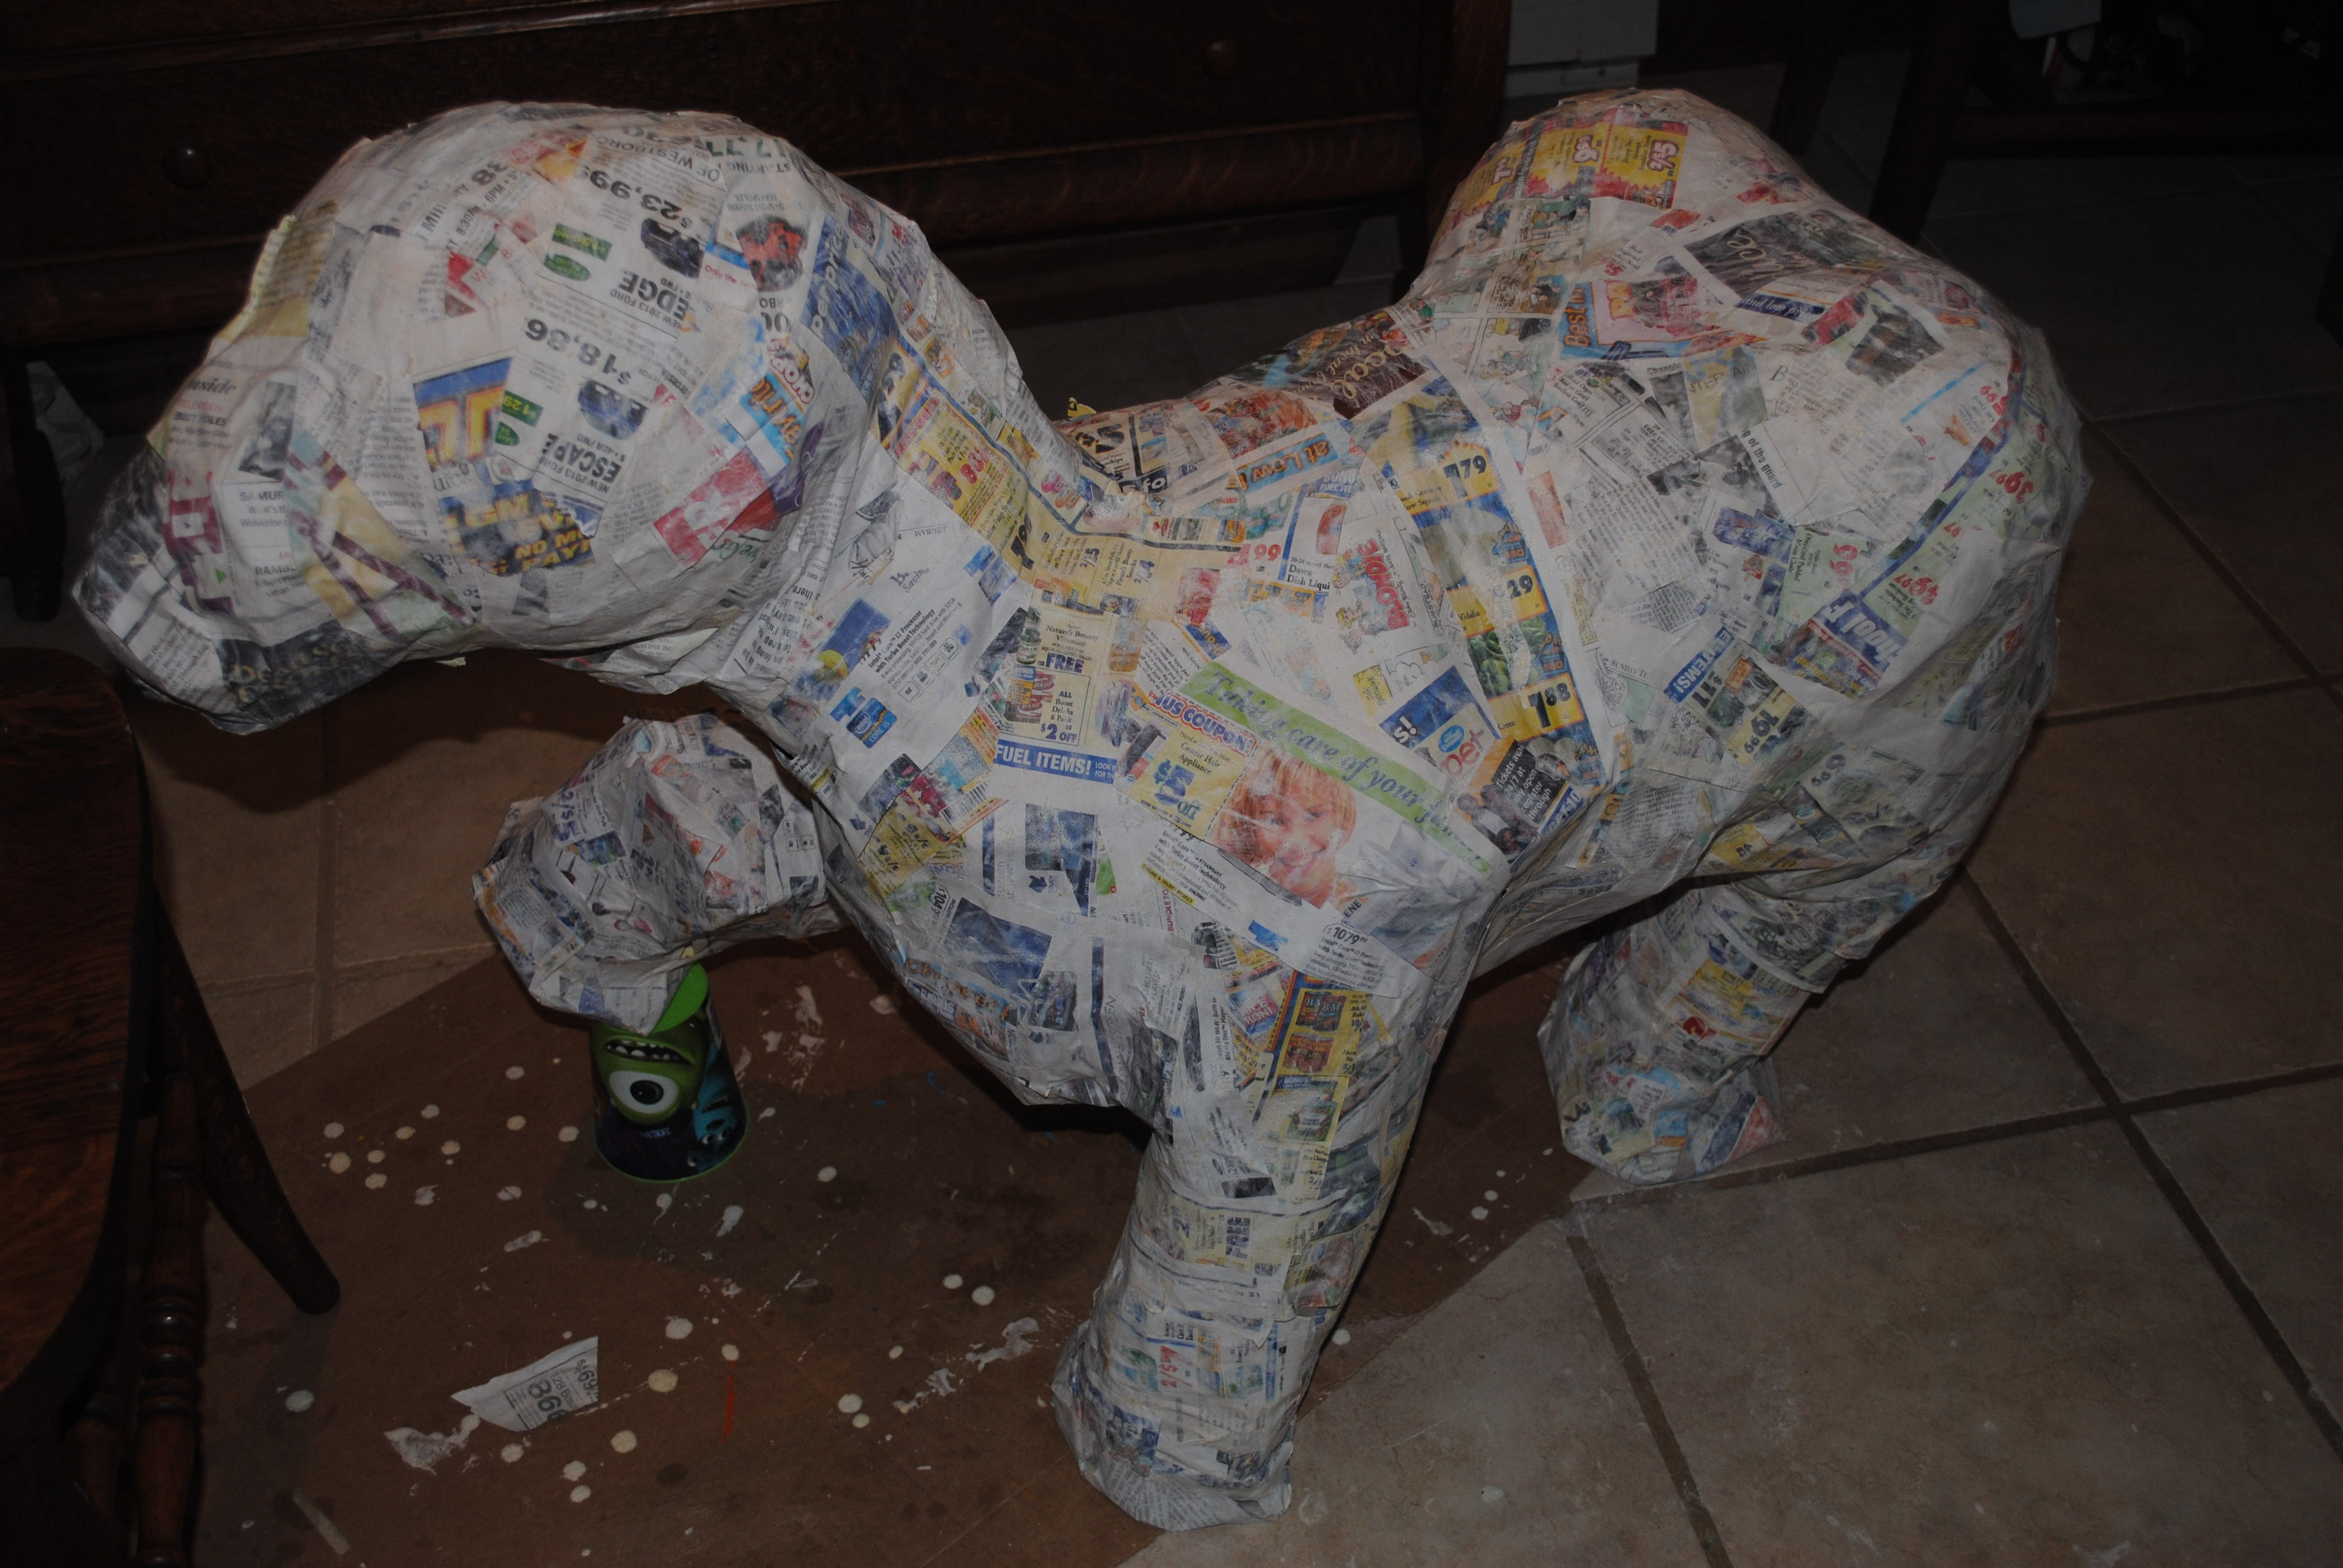
Third layer is on and some areas are reinforced with additional layers after drying. The main area that is going to break will only be four layers of paper, but the legs and head need more to hold together. I try to smooth out the rear so it looks a little less bootylicious. It takes a few days to finish since I need it to dry thoroughly; it’s pretty sturdy now and can take quite a bit of knocking around. Hmm, why is it looking like a dinosaur?

Reinforcing key areas.
It is now strong enough to lay upside down and I reinforce the legs, hooves, chest, and parts of the belly that were tough to reach when it was standing. Then it hits me. I forgot the tail! Well, that’s just great. I say a few choice four letter Old English words, and the one German curse I know.

Another recycling rummage.
I’ve rummaged in our recycling so often that I’m thinking I should consider making a career out of salvage. While grumbling, I discover a pizza box, Google Twilight Sparkle’s tail, free hand draw an outline, cut it out, and tape in an adjustment because I forgot to accommodate a way to actually attach it to the paper mache’d pony. It dawns on me suddenly that I have to make the thing 3D. Back to cutting and taping we go. Stupid ass pony.

I’ve never made a 3D tail before.
The crafting gods, it seems, were pleased with me or pitied me or were laughing at me so hard they threw me a bone, because I managed to figure out how to make the tail with that one pizza box (we had no more cardboard left of the same thickness). I taped that thing up, down, and sideways.

A successful tail transplant.
Pony Proctology takes care of the tail transplant. One knife, more papier mache’, and lots of glue got things to hold. It was not a delicate surgery, however, the hindquarters are looking more balanced and proportionate. I figure that it will take two more days to finish since all that is left is the decorating.
How wrong I was.
3 comments on “Mad Craft #4: Do It Yourself My Little Pony Pinata (Part 2 – A Papier Mache’ Cast)”
Leave a comment
E-mail Subscribe and Support


My Reviews
Email Subscribe and Support
Shop With Me!
Shop and Read My Reviews
Aspiring writer, wife, mother of two, owner two cats. Teacher, lover of science, books, science fiction, fantasy, and video games.

Pingback: Mad Craft #4: Do It Yourself My Little Pony Pinata (Part 1 – A 20% Cooler Frame) | Laissez Faire
Pingback: Mad Craft #4: Do It Yourself My Little Pony Pinata (Part 3 – A Fringiponi) | Laissez Faire
Pingback: Mad Craft #4: Do It Yourself My Little Pony Pinata (Part 4 – Finishing Touches) | Laissez Faire