Mad Craft #6: A Frozen Sixth Birthday Party – DIY Olaf Pinata (Part 3- Do You Want to Build a Snowman?))
Welcome back friends! Are you here hoping to hear a story of rainbows and puppies from a land where everything goes smoothly and exactly the way you want? Sorry to say that you will, alas, have to be disappointed. The story should amuse those who have returned for the Mad Craft Near Disaster retelling. Fine, fine go ahead and thrive on my misfortune.
Our story begins with the nagging in my gut that I ignored since part one. I had a feeling that I had made the middle portion of Olaf too small and that his neck had gotten too wide. I then made a fatal error.
Do You Want to Build a Snowman (All Wrong)?

I made this part too small to fit the neck that is supposed to go inside this hole.
I decide in my infinite stupidity (an infectious excitement of my minions) to put the candy and treats in the pinata now to avoid having to cut in a candy door later. DON’T DO IT! The treats are surprisingly heavy and it is a lot of weight especially when the humidity in the air is making it take a long time for the papier mache to dry thoroughly.
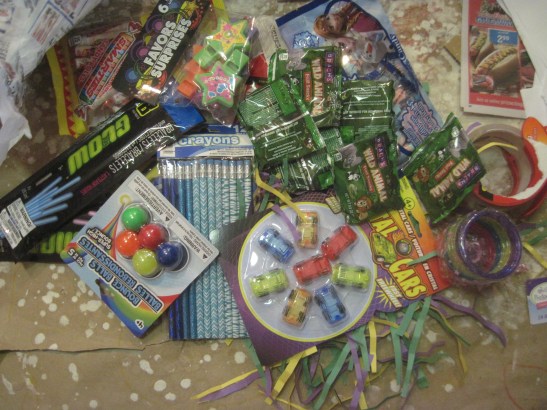
The Loot: bouncy balls, mini cars, pencils, fruit gummies, whistles, bracelets, glow bracelets, smartie candies, chocolates, and Frozen themed candies.

Minions filled the mid-section and butt with the goodies.

Assembly begins.
The middle section fit into the bottom okay, but not quite in the way I intended. It works out okay and is sturdy, except I am beginning to worry about one of the legs from the weight. I being to see the error of my premature candy ways.

Assembly Take 2
Sure, when you look at the picture you might be saying, “Hey, that looks pretty good there!” And then I will tell you to take a closer look at Olaf’s neck goiter and the fact that his head is facing the wrong direction from the body. This, my friends, is head attachment the second time. I had Hobby Husband help me to get the massive head on the first time. The fatal flaws were many which resulted in a rather heart ripping decapitation (and a near rhinoplasty) the next day when it was hung up for safe keeping.
Folly #1: I made the midsection too small so the head didn’t fit in the way it was supposed to for stability.
Folly #2: I put the candy in before assembly.
Folly #3: The cable I used made the head heavy (the head could handle it, but not the rest while wet)
Folly #4: I didn’t apply any glue of any sort to the connecting pieces.
Folly #5: I hung it up before twenty-four hours had passed (weather: rainy, damp)
I tried to reattach the head by myself as best I could, but didn’t realize it was in the wrong position until it was too late. The neck region also became quite thick with all the reinforcement. I did tacky glue also as an added bond insurance. Then I began to have problem with one of the feet that wasn’t reinforced inside. I wasn’t expecting the feet to bear weight. If you make one of these, pack those feet and give them some strength. You’ll be surprised at how often you will need to have the pinata resting on it’s bottom.
Of course, as Hobby Husband and I were talking we kicked ourselves for not utilizing that cable fully to run the entire length of the pinata. It would have been SO COOL to have Olaf’s sections sitting on top of each other but not really connected like in the movie. It would have saved a lot of labor and been such an awesome effect. Had we thought of it at the earlier stage I would have put circle discs on the top of the sections to round them off a bit like the top of the head so they would sit on each other nicely. Curses!
Painting On The Face
Hello, Olaf! It doesn’t take a lot of paint. Despite the issues, I have to say I am pleased. I have to inform you that Olaf has a good side. His left (your right) came out much better. The headless episode caused the other side of his face to bend in a little crooked and put his upper jaw out of alignment. I am sure the kids won’t notice, but I know it’s not quite right!
Two Arms! Two Arms!

Making arms and hands!
Arms and hands took maybe twenty minutes to cut and papier mache. I could have used real sticks, but Olaf has four fingers and a thumb and I thought it would be just easier to make them. In hind sight, I would have covered the base with foil or used a paper rolled into a thin tube. The cardboard came out too triangular. Workable, but not exactly what I had in mind.
The kids were all over me until I finished making the brown color and gave them a brush. Really, it was like moths to a bug light. I would make the base a little longer and a papier mache it to the body (not just hot glue) in retrospect. One of the arms keeps sagging down lower than I’d like. With twilight sparkle I mache’d her tail on and it never sagged.
Cool Coal Buttons
All that we need are the coal buttons! I am especially proud of how they turned out! Hobby Husband says, “Uh, you know, that was my six dollar can of paint for my RC cars that you used to paint aluminum foil.” I say, “I only used like 25 cents worth! Look how awesome they came out!”
I did strut around for a little bit before we put the finishing touches on Olaf. If the picture instruction seem unclear, you can watch the short video below.
Putting on the Glitz

Shake Shake Shake!
I decided not to use crepe paper for this project because it takes a while and I am running out of time, and Olaf has a very sparkly snow texture in pictures. He’s magic. Magic means glitter! Glitter frenzy is definitely and outside project. We did lose some glitter to the grass because small people tend not to follow your instructions when you leave for twenty seconds. Just saying.

He looks a little weird from this angle, but trust me when I say his left side is his best side!
Some stick hair, glue on his coal, and there he is! All done! If you are going to make this pinata, do note that glitter sticks to everything, but not everything sticks to glitter. I really had to wait for the hot glue to dry on those coal pieces before I let them go. Gravity makes his left arm droop, and I put the right one on with the thumb facing the wrong direction. A small detail, but it is bugging me because I realized the error too late to fix it. Kind of like that shelf I put on backwards twenty years ago on that CD shelf unit I still own. Yes, it still irks me that I put it on backwards (but not enough to fix it).
Cost for Pinata:
$0.25 (for the flour and salt)
$2.67 (for a new mini glue gun with a ROUND %^$ing holes)
$4.94 (two 40z shakers of iridescent glitter)
$0.50 (stinky cheap pvc glue)
$1.00 (on hand odds and ends: foil, hot glue, tempera paint, tape)
$0.00 carboard
$0.00 junk mail newspaper, liberated cheap office copy paper
$0.00 black spray paint (from Hobby Husband stash)
$0.00 sticks and acorns (from yard)
SubTotal: $9.36
Cost for Pinata Filling:
$13.00 (pencils, glow bracelets, candy, other bits)
Grand Total: $22.36
Labor and Sanity Upcharge: $300
Part 1: Framework
Part 2: Head and Face and Nose and Hook
E-mail Subscribe and Support


My Reviews
Email Subscribe and Support
Shop With Me!
Shop and Read My Reviews
Aspiring writer, wife, mother of two, owner two cats. Teacher, lover of science, books, science fiction, fantasy, and video games.
