Mad Craft #6: A Frozen Sixth Birthday Party – DIY Frozen Trolls (Part 4 – Tin Can Troll Bowling)

Share the love.
I bet you are wondering what I was going to do with those tin cans I had paper mache’d from the scraps from the mentioned Epic Snowflake Project and the DIY Olaf Pinata. I decided that a fun activity would be Olaf Bowling Pins made out of plastic soda bottles (of which we have many). Go here for inspiration: Olaf Bowling Bottles.
However, I thought that would be just too many Olafs and I didn’t feel like painting plastic bottles. Plus, I had all those craft scraps. Enter tin cans. I had been saving big tomato and baked bean cans for a while for some unforeseen project in the unnamed future. I decided that the paper mache would be economical and eliminate the need to spray paint the cans. I could paint them with tempera paint I already had and decorate them with markers.
And Troll Bowling was born! Ahhhhhhhhhh!
It’s Trolling Time!

Don’t be shy about child labor!
Cover some empty tins with white paper, or white papier mache, and color them gray (or use gray paper). Or just spray paint the cans if you want. I didn’t want to use spray or acrylic paint, so I opted for paper so I could used tempera.

Go nuts! Give them all sorts of faces and expressions. The trolls have very simple lines that even a stick-figure artist can do reasonably well. If you really can’t draw at all, you can cut foam or paper shapes and glue them on (circles, bat-ears, ovals, oblongs, half-moons, and squares will produce a very respectable troll.

Here are some tips to help you get nice results even if you aren’t good at drawing.
- Whether you spray paint or use papier mache’ and tempera paint like I did, be sure it is thoroughly dry first before drawing (or gluing) anything on!
- Make your lines bold. A sharpie makes nice dark lines that won’t bleed. It is okay if it is imperfect. Mine have all sorts of flaws, but there is beauty in imperfections.
- Whiten the eyes and teeth it really makes all the difference against the black lines for very little effort. I have an awesome white zig paint marker.
- Draw inspiration from different pictures of frozen trolls so you can make each one unique. I used Google images to recreate Grand Pabby, Kristof’s adoptive mom, and the little kid trolls he talks too. Even if you just tilt a smile another direction or put the pupils facing something other than forward it really gives them personality. You can give fewer/more teeth, change the shape of the ears, use eyebrow tilts, and make the eyes slightly different shapes other than perfect circles. All those little things make the faces unique.
- Add color. I used markers to add their magic stones, and some hair in different styles. You don’t have to, or you can go further and glue on glittery plastic or foam gems, hot glue on moss hair, or foam clothes.
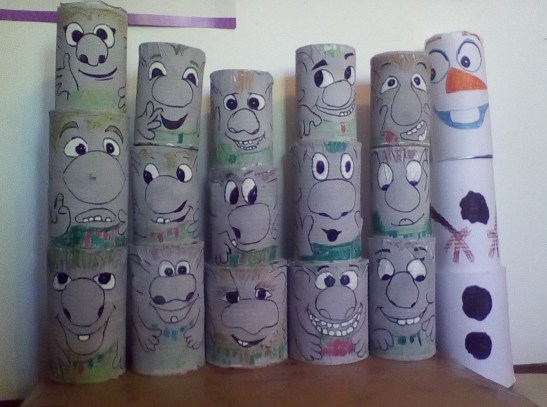
Olaf is covered simply in plain white paper. The paper mache makes the trolls look more stone-like!
Below is a slide show that gives you a better look of the trolls. I have to say that I am quite pleased with myself. I think these came out awesome. Dear Husband gave me a rather ho-hum reaction. I guess compared to Olaf Pinata these don’t impress!
Oh…don’t forget the moss ball! Can’t bowl without a ball! I wonder how long this moss will last once the kids get to it!
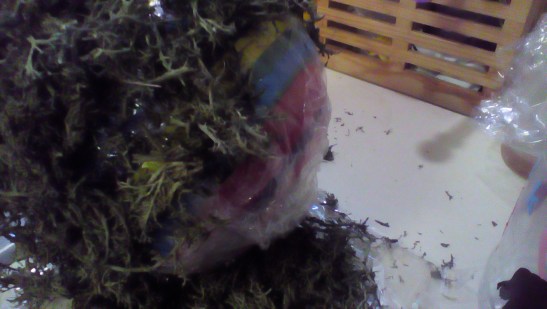
Stole one of the kids balls, wrapped it in plastic wrap, and tacky glued on moss.
Cost for Troll Bowling:
$0.00
(I had everything I needed, you paint or markers)
Do you like this project? Comment, like, and share. Thank you!
2 comments on “Mad Craft #6: A Frozen Sixth Birthday Party – DIY Frozen Trolls (Part 4 – Tin Can Troll Bowling)”
Leave a comment
E-mail Subscribe and Support


My Reviews
Email Subscribe and Support
Shop With Me!
Shop and Read My Reviews
Aspiring writer, wife, mother of two, owner two cats. Teacher, lover of science, books, science fiction, fantasy, and video games.

Love the cost…$0.00. And the do-it-yourself projects are always the best.
Thanks for sharing! 🙂
~Carl~
LikeLiked by 1 person
The only thing better than free cost, is free money. Lol
LikeLiked by 1 person